I know, some of you Microsoft bashers (probably Linux lovers) will hate this article as a matter of principle. Well, feel free to click away. Here's a good site. For the rest of you, get ready to learn how to put your mind at ease when it comes to your backups.
Before even starting on a backup configuration, I'm assuming you've got one thing in place already-something to back up to. There are many possible solutions, each with their good points and their bad points. That is a subject for another article. For the sake of this article, we'll assume you are using an external USB drive.
Here is a step-by-step tutorial on setting up synchronization using SyncToy 2.0:
Download and install SyncToy 2.0 from Microsoft's download page.
Run SyncToy. Go to start, Programs, SyncToy 2.0. The first time you run the program, you are given the opportunity to participate in the Customer Experience Improvement Program. I chose not to. Here's what you'll see the first time:


Click 'Create New Folder Pair'. Here's what you'll see now:

Imagine taking something from the left side of your desk and placing it on the right side. That's how SyncToy 2.0 organizes synchronization. You choose which files you want to synchronize (left side) and where you want the files synchronized to (right side). So I'm synchronizing my c:\logs folder to my z:\logs folder (on the USB drive). Click 'Next'

There are three options on the next screen. If you select each option, it describes it in the pane to the right. I chose 'Echo', which only takes what I have in the c:\logs folder (left side) and puts it on my USB drive (right side). Click 'Next'.

Name your folder pair. Choose something descriptive so you know what it does when you look at it later. Click 'Finish'.

Here's where SyncToy 2.0 gets interesting. You can have multiple folder pairs each with different actions associated with them. You can run one or all of them at the same time. Personally I run a nightly synchronization. This way it's not running while I need my computer's processing power during the day.
If you press the 'Preview' button, you will get a list of files that would be synchronized if you were to run it now. Here's a sample from my c:\logs directory:

Advanced Options
One of the most powerful options available in SyncToy 2.0 is the scheduling feature. This can be used to run a synchronization when nobody is logged on to your computer or at an hour when you're peacefully dreaming about what you would do if you were on Survivor. Here's how to schedule SyncToy 2.0.
In Windows XP, open your control panel. Choose 'Scheduled Tasks', then 'Add Scheduled Task'. You'll see the following. Click 'Next'.
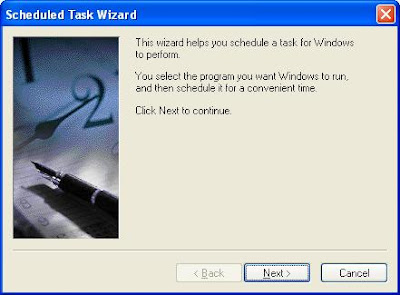
In Windows XP, open your control panel. Choose 'Scheduled Tasks', then 'Add Scheduled Task'. You'll see the following. Click 'Next'.

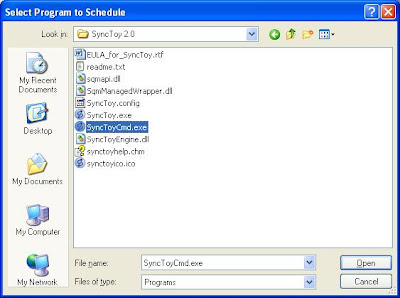
If you choose the program from this menu, scheduling won't work. Click 'Browse'.

Go to c:\Program Files\SyncToy 2.0 and select 'SyncToyCMD.exe'. Click 'Open'.
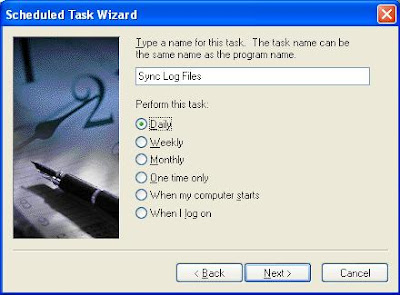
Enter a name for your scheduled job. Name it something descriptive so you'll know what it is next time you look at it. Select the frequency of your schedule. I chose to run it daily. Click 'Next'.
The wizard asks for authentication information. Enter the appropriate username and password for your job to run under. Click 'Next'.

If you have multiple folder pairs and you want all of them to run, you need to select 'Open advanced properties for this task when I click Finish'. Click 'Finish'.

Go to c:\Program Files\SyncToy 2.0 and select 'SyncToyCMD.exe'. Click 'Open'.

Enter a name for your scheduled job. Name it something descriptive so you'll know what it is next time you look at it. Select the frequency of your schedule. I chose to run it daily. Click 'Next'.

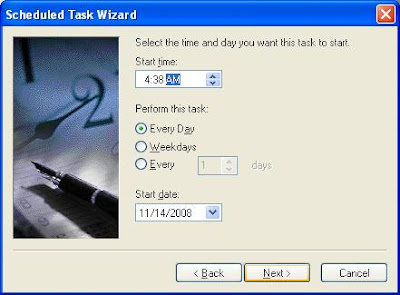
Now you get to choose a time. Obviously, you'll need to select a time when your computer will be running. I know, it seems obvious... Click 'Next'.

The wizard asks for authentication information. Enter the appropriate username and password for your job to run under. Click 'Next'.

If you have multiple folder pairs and you want all of them to run, you need to select 'Open advanced properties for this task when I click Finish'. Click 'Finish'.


If you want all of your folder pairs to sync on this schedule, modify the 'Run' line to include the -R command.

Well, there you have it. Now you can rest easy knowing your files are synchronizing and your data is safe. Now you can move on to more exciting things, like making a fort for your kids out of a washing machine box or cleaning the dead ladybugs from your light fixtures. At any rate, enjoy the remainder of your day!